
Adding shelves to your home can be both functional and decorative. Whether you want to display your favorite books, showcase decorative pieces, or organize your space better, DIY shelves offer a cost-effective and personalized solution. In this article, we’ll explore 15 DIY shelf ideas that are easy to make, require minimal tools, and add style to any room. Let’s dive into some fantastic DIY shelving projects that will enhance your home!
Key Takeaways
- DIY shelves are affordable, easy to make, and can be customized to fit any space.
- Use different materials like wood, metal, or even reclaimed items to create unique shelf designs.
- DIY shelves can be used in every room of your house, from living rooms and kitchens to bathrooms and bedrooms.
- Choose the right shelf style to match your home decor and storage needs.
- Many DIY shelf projects require only basic tools and beginner-level skills.
Related Link: Best DIY Shelving Projects for Beginners
DIY Shelf Ideas
Following are the best DIY ideas to create shelves for your use:
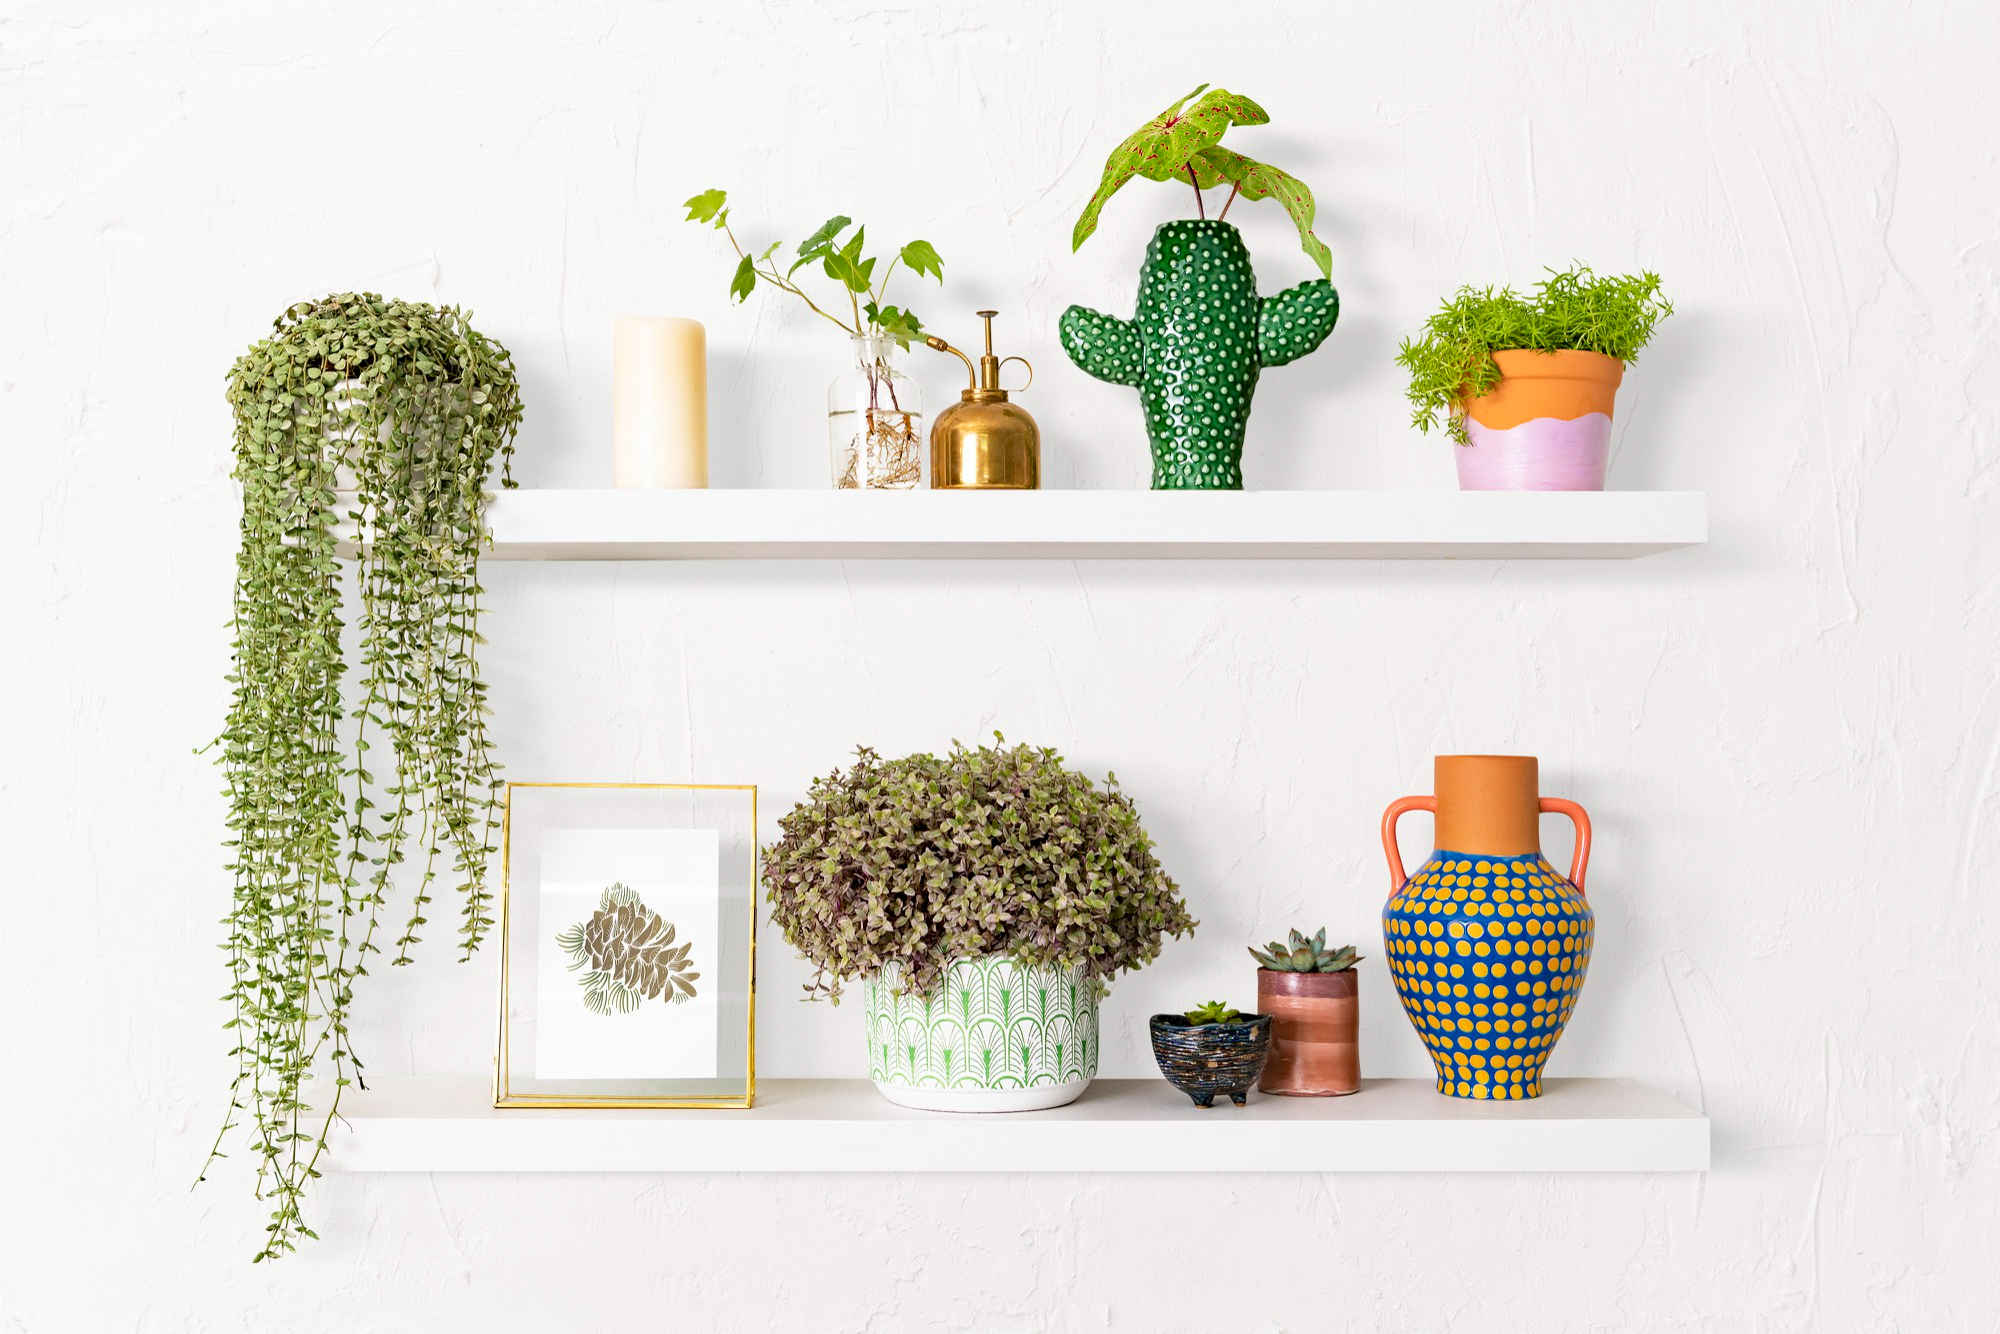
1. Floating Shelves
Floating shelves are one of the most popular and simple DIY shelf projects. They provide a clean and modern look because they appear to “float” without visible brackets or supports.
Materials Needed:
- Wooden planks
- Wall anchors
- Screws
- L-brackets (for additional support, if needed)
Instructions:
- Cut the wooden planks to your desired length.
- Install wall anchors into the wall where you want to place the shelves.
- Attach the planks using screws and wall anchors.
- Use L-brackets for extra support if needed.
Learn More: How to Make Floating Shelves
2. Ladder Shelf
If you have an old ladder lying around, transform it into a ladder shelf. This type of shelf is great for holding plants, books, or even bathroom towels.
Materials Needed:
- Wooden ladder
- Sandpaper
- Paint or wood stain (optional)
- Wooden planks
Also Read: Adding Storage to a Small Kids Bedroom: A Complete Guide
Instructions:
- Sand the ladder to smooth out rough edges.
- Paint or stain it if desired.
- Place wooden planks across the rungs to create shelves.
Learn More: DIY Ladder Shelf Tutorial
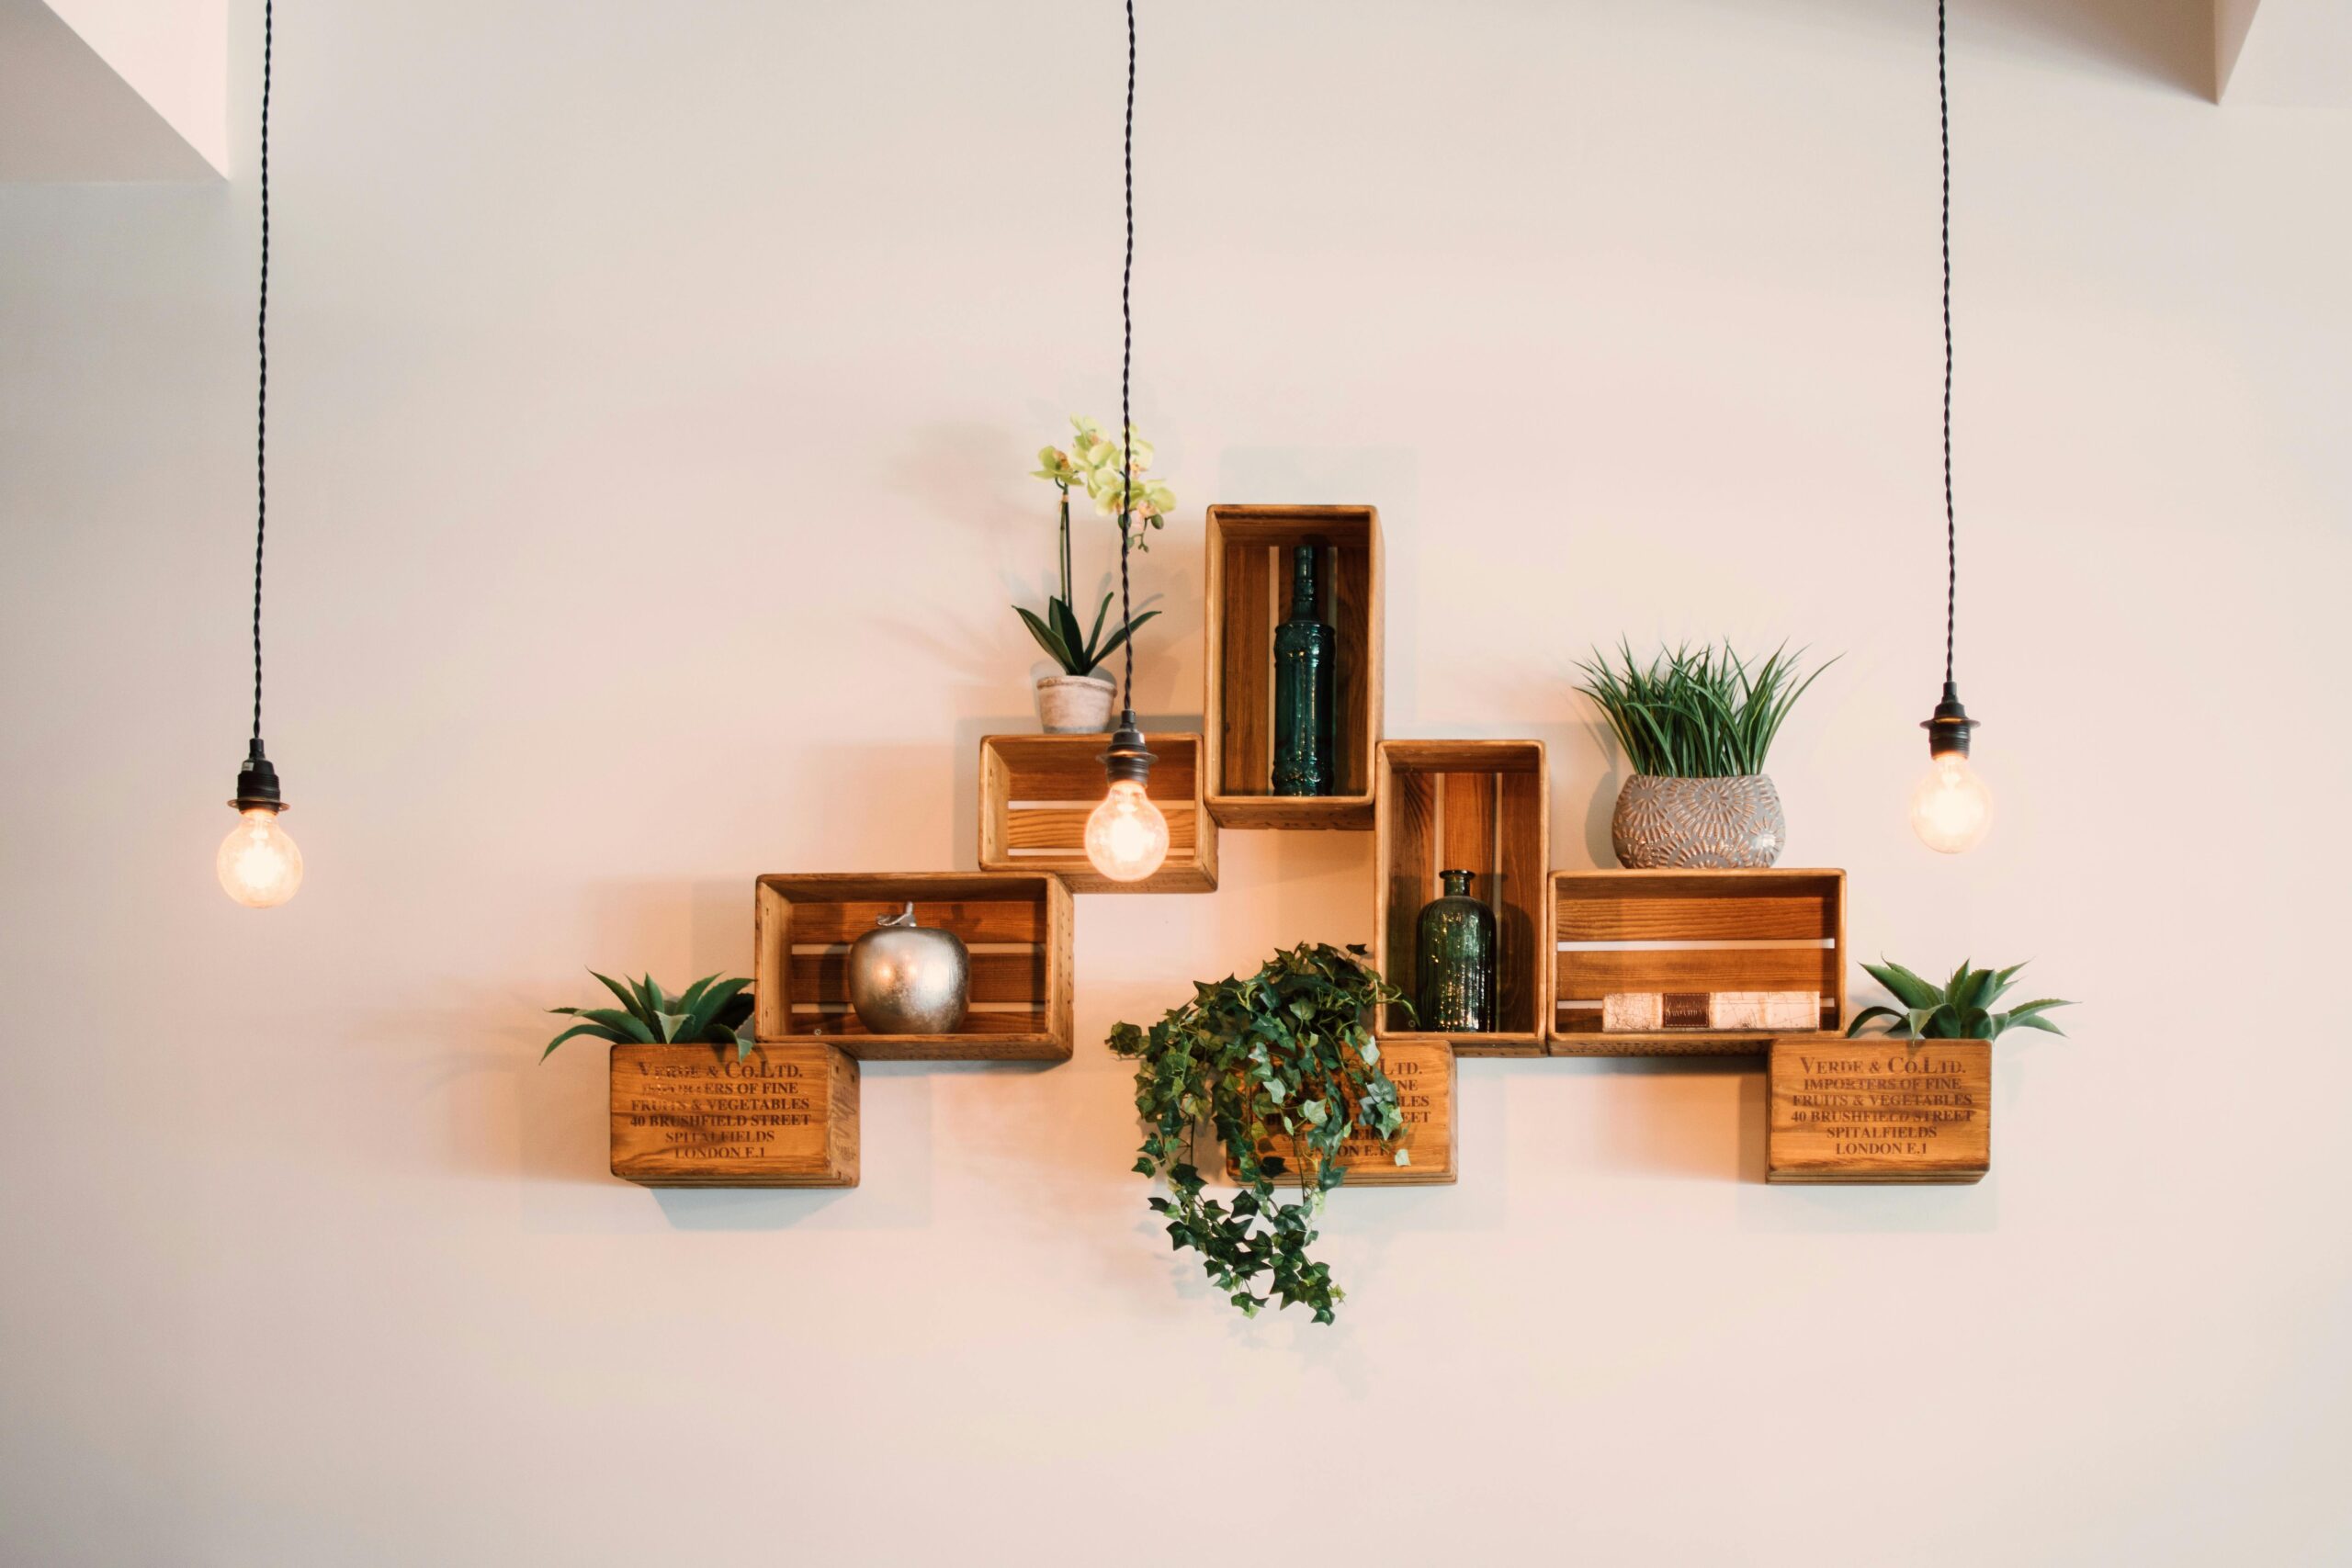
3. Crate Shelves
Create rustic crate shelves by stacking and attaching wooden crates. They offer a farmhouse vibe and are perfect for storing toys, books, or kitchen items.
Materials Needed:
- Wooden crates (new or reclaimed)
- Screws or wood glue
- Sandpaper
- Paint or stain (optional)
Instructions:
- Sand the crates and paint or stain them if desired.
- Stack the crates in your preferred configuration.
- Attach the crates using screws or wood glue.
Learn More: DIY Wooden Crate Shelves
4. Rope Shelves
Rope shelves add a unique touch to any room. They are especially great for a nautical or boho-themed space.
Materials Needed:
- Wooden boards
- Thick rope
- Drill
- Hooks
Instructions:
- Drill holes into the corners of the wooden boards.
- Thread the rope through the holes and tie knots to secure.
- Attach the hooks to the wall and hang the shelves.
Learn More: How to Make Rope Shelves
5. Corner Shelves
Maximize unused corner space by adding corner shelves. These shelves are easy to build and can turn an empty corner into a functional storage area.
Materials Needed:
- Wooden boards
- L-brackets
- Screws
- Wall anchors
Instructions:
- Cut the wooden boards into triangular shapes to fit your corner space.
- Attach L-brackets to the wall.
- Secure the boards onto the L-brackets.
Related Link: DIY Corner Shelf Ideas
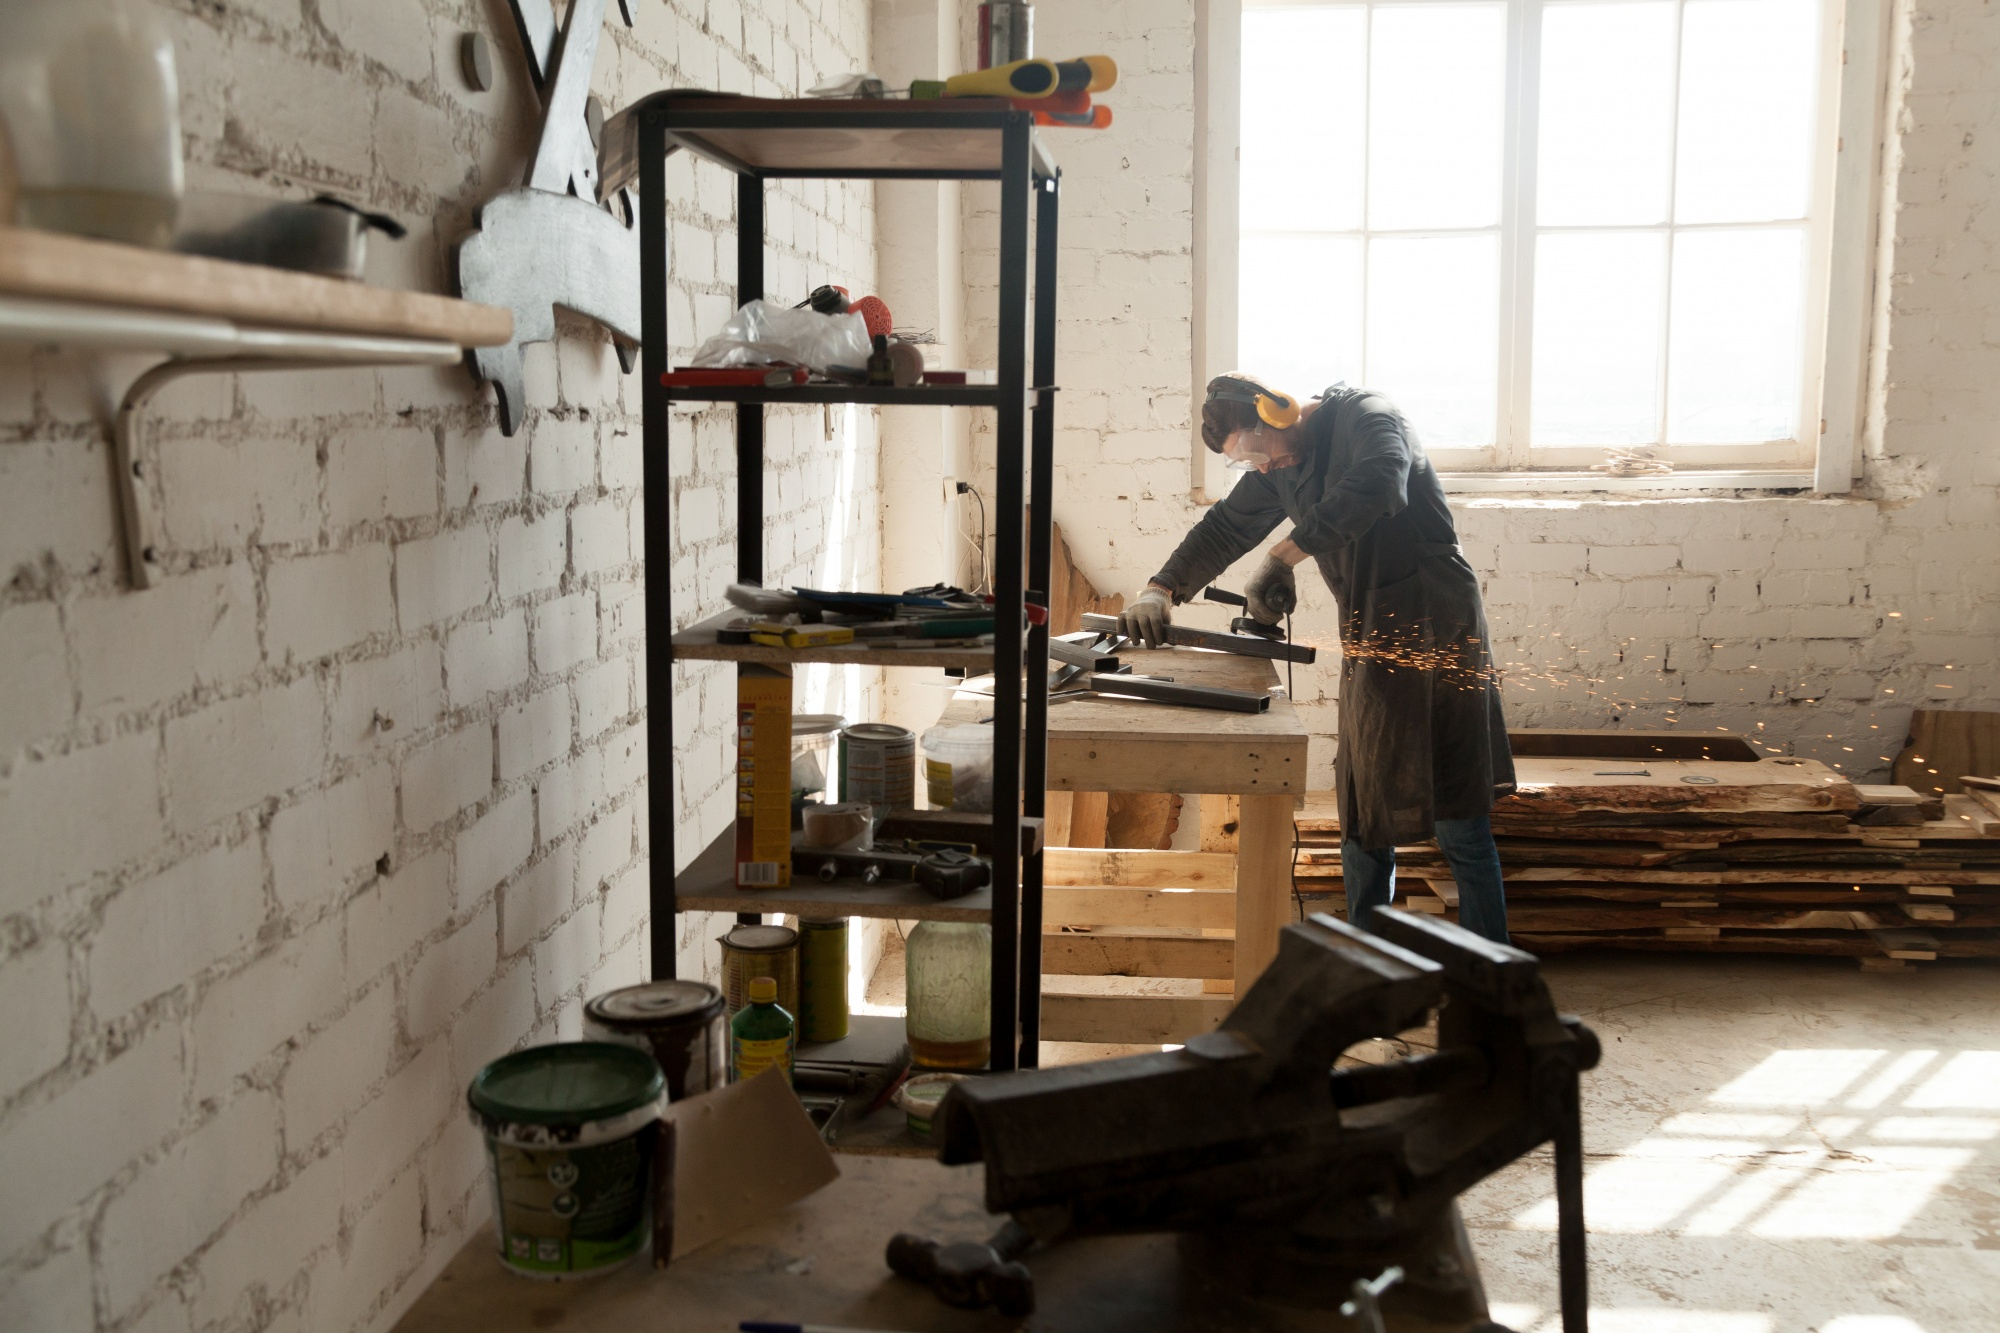
6. Industrial Pipe Shelves
For a more industrial look, try making pipe shelves. These shelves combine wood and metal pipes for a sturdy and stylish design.
Materials Needed:
- Metal pipes and fittings
- Wooden boards
- Screws
- Wall anchors
Instructions:
- Cut the wooden boards to your desired length.
- Attach the metal pipes to the wall using wall anchors.
- Secure the boards on top of the pipes.
Learn More: How to Build Industrial Pipe Shelves
7. Pallet Shelves
Pallets are versatile and easy to work with, making them perfect for DIY shelving projects. Use pallet shelves to create a rustic, country-style look in your home.
Materials Needed:
- Wooden pallets
- Hammer and nails or screws
- Sandpaper
- Paint or stain (optional)
Instructions:
- Disassemble the pallet and cut the boards to your desired size.
- Sand the boards and stain or paint them if desired.
- Reassemble the boards into a shelf shape and mount them on the wall.
Related Link: DIY Pallet Shelf Tutorial
8. Hanging Bookshelf
Create a hanging bookshelf for your kid’s room or home office. This design uses fabric and dowels to hold books in place.
Materials Needed:
- Wooden dowels
- Fabric
- Screws and anchors
- Sewing machine
Instructions:
- Sew fabric pockets to fit the dowels.
- Insert the dowels through the fabric.
- Attach the dowels to the wall using screws and anchors.
Learn More: How to Make a Hanging Bookshelf
9. Hexagon Shelves
Hexagon shelves are trendy and eye-catching. They’re perfect for displaying small plants, candles, or other decorative items.
Materials Needed:
- Wooden planks
- Nails or screws
- Wood glue
Instructions:
- Cut the wooden planks at 30-degree angles to form a hexagon shape.
- Secure the pieces together using wood glue and nails.
- Mount the shelves on the wall using wall anchors.
Related Link: DIY Hexagon Shelves
10. Leaning Ladder Shelf
A leaning ladder shelf is easy to make and doesn’t require any mounting. It simply leans against the wall, making it portable and ideal for renters.
Materials Needed:
- Wooden boards
- Nails or screws
- Sandpaper
- Paint or stain (optional)
Instructions:
- Cut the boards to your desired length.
- Assemble the boards in a ladder shape.
- Sand and paint the ladder as needed.
Learn More: DIY Leaning Ladder Shelf Tutorial
11. Pegboard Shelf
Use a pegboard shelf in your craft room, kitchen, or garage for adjustable storage. Pegboards are versatile and can be customized with hooks, shelves, and baskets.
Materials Needed:
- Pegboard
- Pegboard hooks
- Shelves or baskets
Instructions:
- Mount the pegboard on the wall.
- Add hooks and shelves to customize storage.
Learn More: Best Pegboard Shelf Ideas
12. Floating Box Shelves
Floating box shelves provide more depth than standard floating shelves and are ideal for displaying larger items like vases or plants.
Materials Needed:
- Wooden planks
- Screws
- Wall anchors
Instructions:
- Cut the wooden planks into rectangular pieces.
- Assemble the pieces to form a box shape.
- Attach the box shelves to the wall.
Learn More: DIY Floating Box Shelves
13. Reclaimed Wood Shelves
For a rustic, eco-friendly project, create reclaimed wood shelves using old wood. This is perfect for farmhouse or vintage-style decor.
Materials Needed:
- Reclaimed wood
- Sandpaper
- Nails or screws
Instructions:
- Sand and clean the reclaimed wood.
- Cut the wood to the desired size.
- Mount the shelves on the wall using nails or screws.
Related Link: Reclaimed Wood Shelf Ideas
14. Book Ledge Shelves
Book ledge shelves are a great way to display your books face-out, making it easier to see covers and titles. These shelves are ideal for kids’ rooms or home libraries.
Materials Needed:
- Wooden boards
- Screws
- Paint or stain (optional)
Instructions:
- Cut the boards into narrow strips.
- Assemble the strips into an L-shape.
- Mount the L-shape shelves onto the wall using screws.
Learn More: How to Build Book Ledge Shelves
15. Live Edge Shelves
Live edge shelves add a natural and organic look to your space. They use raw-edged wood slabs, which show the natural shape of the tree.
Materials Needed:
- Live edge wood slab
- Sandpaper
- Wall brackets
Instructions:
- Sand the live edge wood to smooth out rough spots.
- Attach wall brackets to the wood slab.
- Secure the shelf onto the wall using the brackets.
Related Link: How to Make Live Edge Shelves
Final Thoughts on DIY Shelf Ideas
Adding DIY shelves to your home is a great way to personalize your space while staying within budget. These 15 DIY shelf ideas provide various options to suit different rooms, styles, and skill levels. Whether you prefer a modern floating shelf, an industrial pipe shelf, or a rustic reclaimed wood shelf, these projects will help you create the perfect shelving solution for your home.
Happy DIY-ing!
Additional Resources:
FAQs: 15 DIY Shelf Ideas
1. What materials are best for DIY shelves, and how do I choose the right one?
The materials you choose for your DIY shelves depend on the style, purpose, and budget. Common materials include solid wood, plywood, MDF (Medium-Density Fiberboard), metal pipes, and reclaimed wood. Solid wood is ideal for a classic, sturdy shelf, while plywood and MDF are cost-effective options for lightweight shelving. Metal pipes can be combined with wood for an industrial look, and reclaimed wood offers a rustic, eco-friendly alternative. When choosing materials, consider the weight the shelves need to support, the style of your home, and the shelf’s intended use. For instance, heavy items like books require strong wood, while decorative pieces can be displayed on lighter, thinner shelves.
2. How do I determine the right shelf size and spacing for my DIY project?
To determine the right shelf size and spacing, first consider the wall space available and the items you want to store or display. Measure the length and depth of the wall to ensure the shelves fit without overcrowding the area. For most shelves, a depth of 10-12 inches is sufficient, but you can go deeper for bulkier items. The spacing between shelves should be at least 10-15 inches, depending on the height of the objects. If you’re displaying books or tall items, increase the spacing accordingly. Mark the measurements on the wall before installation to visualize the final look.
3. What tools and equipment do I need for basic DIY shelf projects?
For most basic DIY shelf projects, you’ll need the following tools and equipment: a measuring tape, level, pencil, drill, screws, wall anchors, saw (hand or electric), and sandpaper. Additional tools like a stud finder can be useful for mounting shelves securely. If you’re working with metal pipes or reclaimed wood, you may also need a pipe cutter or a sander. Having the right tools not only ensures a successful project but also keeps the process safe and efficient. If you’re new to DIY projects, start with basic tools and upgrade as needed.
4. How can I ensure my DIY shelves are securely mounted and safe?
To ensure your DIY shelves are securely mounted, follow these steps:
- Find Wall Studs: Use a stud finder to locate studs behind the wall. Mounting shelves directly into studs provides extra support.
- Use Wall Anchors: If you cannot mount the shelves into studs, use heavy-duty wall anchors that are rated for the weight you plan to place on the shelves.
- Check the Weight Capacity: Consider the weight of the items you’ll be placing on the shelf and choose brackets or supports that can handle the load.
- Level and Secure: Use a level to ensure the shelf is straight and evenly mounted. Secure with screws or brackets, and double-check the stability before placing items on it.
5. Can I use reclaimed or recycled materials for DIY shelves, and what are the benefits?
Yes, using reclaimed or recycled materials for DIY shelves is a fantastic way to create unique, eco-friendly designs while keeping costs down. Reclaimed wood from old furniture, pallets, or barn wood offers a rustic look and helps reduce waste. Metal pipes, leftover plywood, or even old crates can also be repurposed into stylish shelves. The benefits include environmental sustainability, cost savings, and the ability to create one-of-a-kind pieces that reflect your personal style. Be sure to clean and treat reclaimed materials before use to ensure they are free from pests or contaminants.
6. What are some common mistakes to avoid when building DIY shelves?
Some common mistakes to avoid when building DIY shelves include:
- Incorrect Measurements: Always measure twice and cut once. Incorrect measurements can result in misaligned or poorly fitting shelves.
- Overloading the Shelves: Avoid placing too much weight on the shelves, especially if they are not mounted into studs or lack strong brackets.
- Skipping Sanding and Finishing: Not sanding or finishing the wood can lead to rough edges, splinters, or an uneven appearance.
- Using Inadequate Supports: Ensure the brackets or wall anchors are strong enough to hold the intended weight.
- Ignoring Wall Type: Different wall types (drywall, plaster, brick) require specific mounting hardware. Use the right tools for your wall type to ensure secure installation.
7. How can I customize my DIY shelves to match my home decor?
You can customize your DIY shelves by selecting different materials, shapes, and finishes that complement your home decor. For a modern look, consider using metal and glass, or opt for painted plywood with a glossy finish. For a rustic or farmhouse style, use reclaimed wood or distressed paint. Adding decorative brackets, using different paint colors, or incorporating patterned wallpaper on the back of the shelves can also enhance the design. Consider the overall style of the room and use your shelves as a way to tie the decor together.
8. What are the best DIY shelf ideas for small spaces?
For small spaces, choose shelf designs that optimize vertical space and minimize footprint, such as floating shelves, corner shelves, and pegboard shelves. Floating shelves keep the floor clear, while corner shelves utilize unused areas. Pegboard shelves offer adjustable storage and can be customized to hold small items like kitchen utensils or craft supplies. Another option is leaning ladder shelves, which provide multiple tiers of storage without requiring wall mounting. Choose narrow or shallow shelves to avoid overcrowding the room.
9. How do I choose the right shelf brackets or supports for my DIY shelves?
The right shelf brackets or supports depend on the weight and size of your shelf, as well as the type of wall it will be mounted on. For heavy-duty shelves, such as those used for books or kitchen items, choose sturdy brackets that can support at least 100 pounds. For lighter shelves, basic L-brackets or floating shelf supports will suffice. When mounting on drywall, use heavy-duty wall anchors. For brick or concrete walls, use masonry anchors and screws. Make sure the brackets are evenly spaced to distribute weight.
10. What are some beginner-friendly DIY shelf projects to start with?
Beginner-friendly DIY shelf projects include floating shelves, crate shelves, and hanging rope shelves. Floating shelves require only basic cutting and mounting skills, while crate shelves can be made by simply stacking and securing wooden crates. Hanging rope shelves involve threading rope through pre-drilled holes in wooden boards and securing them to wall hooks. These projects require minimal tools and materials, making them ideal for beginners looking to try their hand at DIY shelving.