
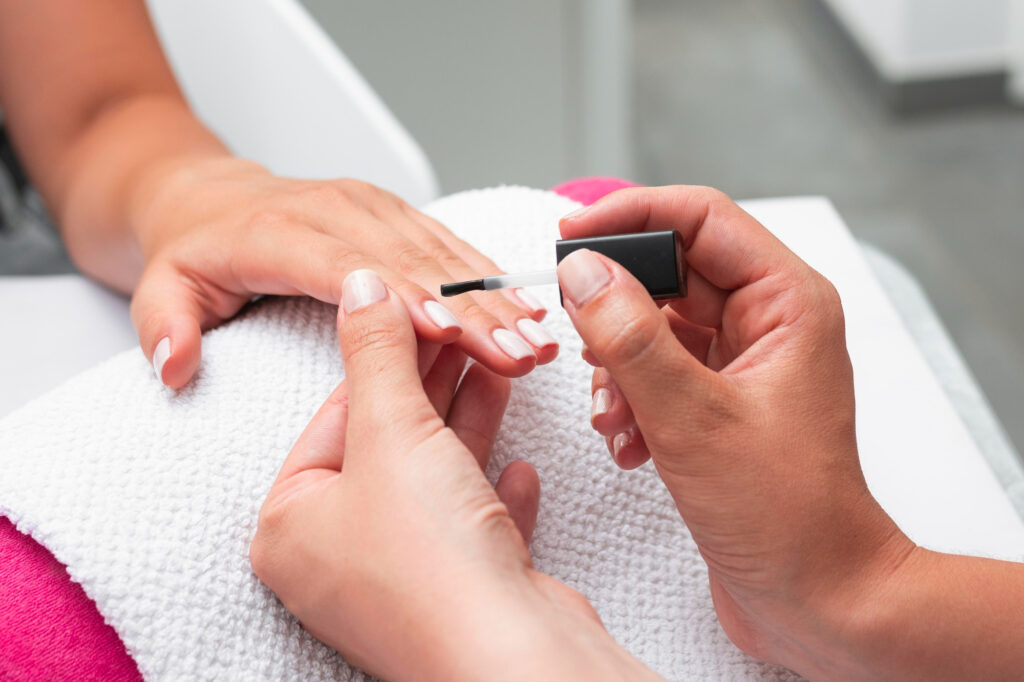
When it comes to nail care, we often think about trimming, filing, and applying polish, but there’s one important step that many people overlook: nail exfoliation. Just as your skin needs regular exfoliation to remove dead cells and reveal a healthy glow, your nails and the skin around them can benefit from the same treatment. But what exactly is nail exfoliation, and why is it important? This article will guide you through everything you need to know about this often-missed step in your nail care routine, helping you achieve healthier, stronger, and more beautiful nails.
Understanding: What is Nail Exfoliation?
Nail exfoliation involves gently removing dead skin cells and buildup from the surface of your nails and the surrounding cuticle area. Just like facial exfoliation, it helps to reveal smoother, healthier skin and nails by sloughing away rough patches and any impurities that might be clogging your nail bed.
Also Read:
Should I Stick to One Skincare Brand? A Guide for Glowing Skin
Why Is Nail Exfoliation Important?
- Removes Dead Skin Cells: Regular exfoliation helps to get rid of dead skin cells that can accumulate around your nails, leading to a more polished and clean appearance.
- Prevents Hangnails: By keeping the skin around your nails soft and smooth, exfoliation can reduce the occurrence of painful hangnails.
- Improves Nail Health: Exfoliation can help prevent common nail problems like dryness, peeling, and breakage, making your nails stronger and healthier.
- Prepares Nails for Polish: Exfoliated nails are smoother, allowing nail polish to adhere better and last longer without chipping.
More Information: For a deeper understanding of nail exfoliation and its benefits, visit Healthline’s Nail Care Guide.
How to Exfoliate Your Nails: Step-by-Step Guide
Exfoliating your nails doesn’t have to be complicated. Here’s a simple step-by-step guide to help you incorporate this essential practice into your nail care routine.
Step 1: Gather Your Supplies
To start your steps nail exfoliation, you’ll need a few basic supplies:
- Nail Brush: A soft-bristled nail brush will help you gently scrub your nails.
- Exfoliating Scrub: You can use a store-bought scrub or make your own at home with ingredients like sugar, salt, and olive oil.
- Cuticle Pusher: This tool will help you push back your cuticles gently after exfoliation.
- Nail Buffer: A nail buffer can help smooth out the surface of your nails after exfoliation.
- Moisturizer or Cuticle Oil: After exfoliating, it’s important to hydrate your nails and cuticles.
Step 2: Soak Your Nails
Start by soaking your nails in warm, soapy water for about 5 minutes. This softens the skin around your nails and makes exfoliation easier and more effective.

Step 3: Apply the Exfoliating Scrub
Take a small amount of the exfoliating scrub and gently massage it into your nails and cuticles. Use circular motions to work the scrub into the skin, paying extra attention to any rough areas.
Step 4: Use the Nail Brush
Using your nail brush, gently scrub each nail and the surrounding cuticle area. This helps to remove any remaining dead skin cells and smooth out your nails.
Step 5: Rinse and Dry
Rinse your hands thoroughly with warm water to remove any scrub residue, then pat them dry with a soft towel.
Step 6: Push Back Your Cuticles
After exfoliating, your cuticles will be softer and easier to push back. Use a cuticle pusher to gently push back the cuticles on each nail. Be careful not to push too hard, as this can damage the cuticles.
Step 7: Buff Your Nails
If desired, use a nail buffer to gently smooth out the surface of your nails. This step is optional but can help create a more polished look.
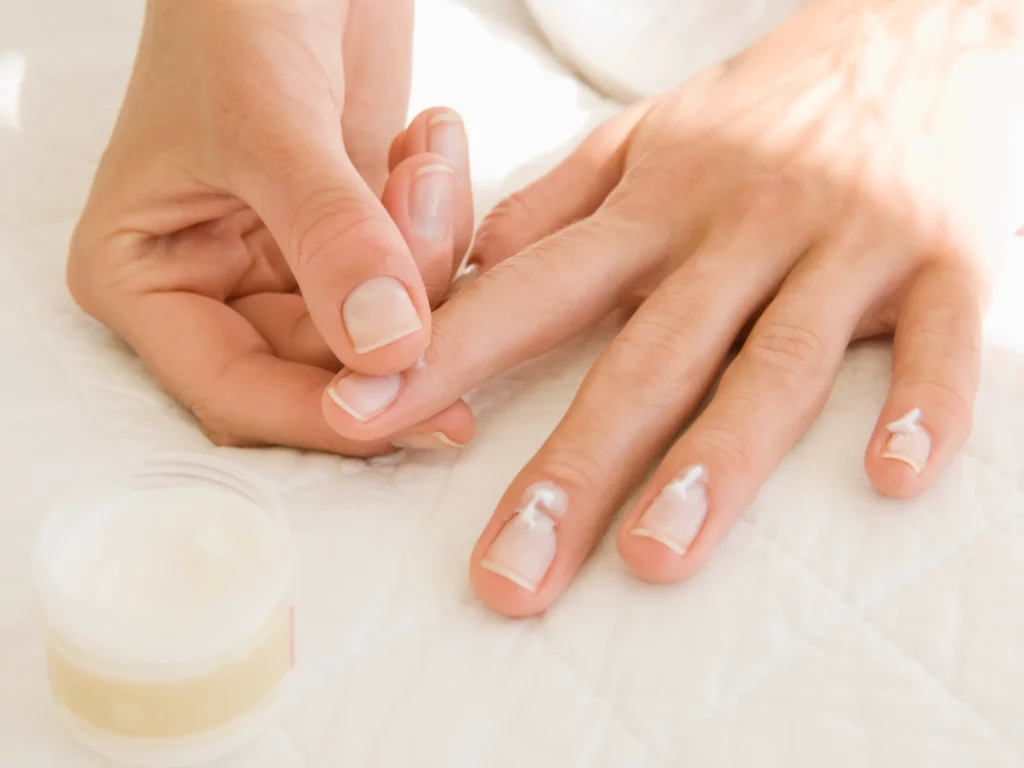
Step 8: Moisturize
Finally, apply a moisturizer or cuticle oil to hydrate your nails and cuticles. This helps to lock in moisture and keep your nails looking healthy and shiny.
More Information: For more tips on nail care and exfoliation, visit Allure’s Nail Care Tips.
DIY Nail Exfoliation Scrubs: Simple Recipes to Try at Home
If you prefer natural and homemade beauty treatments, you can easily create your own nail exfoliation scrubs using ingredients you likely already have in your kitchen. Here are a few simple recipes to get you started.
Also Read:
Do Homemade Sunscreens Actually Work? A Comprehensive Guide
Sugar and Olive Oil Scrub
- Ingredients: 1 tablespoon of sugar, 1 tablespoon of olive oil
- Instructions: Mix the sugar and olive oil in a small bowl. Apply the mixture to your nails and cuticles, gently massaging in circular motions. Rinse with warm water and pat dry.
Honey and Lemon Scrub
- Ingredients: 1 tablespoon of honey, 1 teaspoon of lemon juice, 1 tablespoon of sea salt
- Instructions: Combine the honey, lemon juice, and sea salt in a bowl. Massage the scrub onto your nails and cuticles for a few minutes. Rinse with warm water and dry.
Coffee Grounds Scrub
- Ingredients: 1 tablespoon of used coffee grounds, 1 tablespoon of coconut oil
- Instructions: Mix the coffee grounds and coconut oil together. Apply to your nails and cuticles, scrubbing gently. Rinse with warm water and dry thoroughly.

Oatmeal and Almond Oil Scrub
- Ingredients: 1 tablespoon of ground oatmeal, 1 tablespoon of almond oil
- Instructions: Blend the ground oatmeal with almond oil. Gently massage the mixture onto your nails and cuticles. Rinse with warm water and dry.
More Information: For more DIY scrub recipes, visit Byrdie’s Homemade Beauty Treatments.
Common Mistakes to Avoid When Exfoliating Your Nails
While nail exfoliation is beneficial, there are some common mistakes that can do more harm than good. Here’s what to avoid.
1. Exfoliating Too Often
Over-exfoliating can lead to irritation, dryness, and damage to your nails and cuticles. It’s best to exfoliate your nails once a week to maintain their health without overdoing it.
2. Using Harsh Scrubs
Using scrubs that are too rough can cause micro-tears in the skin around your nails. Always choose a gentle scrub and apply it with light pressure.
3. Ignoring Moisturization
After exfoliating, your nails and cuticles need moisture to stay healthy. Skipping this step can lead to dryness and peeling. Always apply a good-quality moisturizer or cuticle oil after exfoliation.
4. Applying Too Much Pressure
Whether you’re using a nail brush or a cuticle pusher, it’s important to be gentle. Applying too much pressure can damage the nail bed and cuticles, leading to pain and potential infections.
More Information: For more advice on nail care mistakes to avoid, visit Cosmopolitan’s Nail Care Guide.
Benefits of Regular Nail Exfoliation
Incorporating nail exfoliation into your regular nail care routine can have several benefits beyond just aesthetics. Here’s why you should make it a habit.
Healthier Nails
Regular exfoliation helps to remove impurities and dead skin cells that can accumulate around your nails. This promotes healthier nail growth and reduces the risk of common problems like peeling, splitting, and breakage.
Smoother Appearance
Exfoliated nails have a smoother surface, which not only looks better but also makes applying nail polish easier. Polish adheres better to a smooth surface, resulting in a more even and long-lasting finish.

Reduced Hangnails
Hangnails are those small, painful pieces of torn skin that can appear around your nails. Regular exfoliation helps to keep the skin around your nails soft and smooth, reducing the likelihood of developing hangnails.
Enhanced Absorption of Moisturizers
By removing dead skin cells and clearing the surface of your nails, exfoliation enhances the absorption of moisturizers and oils. This ensures that your nails and cuticles stay hydrated and nourished.
More Information: To learn more about the benefits of nail exfoliation, visit NailPro’s Health Tips.
When to Exfoliate Your Nails: Timing and Frequency
Knowing when and how often to exfoliate your nails is key to reaping the benefits without causing damage.
How Often Should You Exfoliate?
For most people, exfoliating your nails once a week is sufficient. This frequency allows you to remove dead skin cells and impurities without irritating the skin or nails. If you have particularly sensitive skin, you might reduce this to once every two weeks.
Best Time to Exfoliate
The best time to exfoliate your nails is after soaking them in warm water. Soaking softens the skin and nails, making exfoliation more effective and reducing the risk of irritation. Many people find that exfoliating their nails as part of a weekly manicure routine works well.
More Information: For more tips on when to exfoliate, visit Women’s Health’s Exfoliation Guide.
Choosing the Right Products for Nail Exfoliation
With so many products available, choosing the right exfoliating scrub, nail brush, and other tools for your nail exfoliation routine can be a bit overwhelming. Here’s how to select the best products for your needs.
Exfoliating Scrubs
When choosing an exfoliating scrub for your nails, look for gentle, natural ingredients that won’t irritate your skin. Avoid scrubs with large, coarse particles, as these can be too harsh on the delicate skin around your nails.
- For Sensitive Skin: Opt for a scrub with fine sugar or oatmeal, which is gentle and soothing.
- For Dry Skin: Look for scrubs with added moisturizers like olive oil, coconut oil, or shea butter to help hydrate your skin as you exfoliate.
- For Tough Skin: If you have particularly rough skin around your nails, a salt-based scrub might be more effective, but use it with care.
Nail Brushes
A soft-bristled nail brush is ideal for exfoliation. Avoid brushes with hard bristles that can scratch and damage your skin. Look for a brush with a comfortable handle that allows you to apply gentle, even pressure.
- Natural Bristles: These are usually softer and more flexible, making them a good choice for sensitive skin.
- Synthetic Bristles: These can be a bit firmer and are durable, easy to clean, and resistant to bacteria.
Cuticle Pushers
Cuticle pushers come in various materials like wood, metal, and plastic. Here’s what to consider:
- Wooden Pushers: These are gentle and disposable, making them ideal for sensitive skin or for those who prefer a softer touch.
- Metal Pushers: These are more durable and effective at pushing back tough cuticles but should be used with care to avoid damage.
- Plastic Pushers: These are a middle-ground option—gentle yet effective, and easy to clean.
Moisturizers and Cuticle Oils
After exfoliation, it’s essential to hydrate your nails and cuticles. Choose a moisturizer or cuticle oil that suits your skin type:
- For Normal Skin: A basic hand cream or cuticle oil with vitamin E can help keep your nails and skin healthy.
- For Dry Skin: Look for rich creams or oils with ingredients like jojoba oil, shea butter, or almond oil for deep hydration.
- For Sensitive Skin: Choose fragrance-free, hypoallergenic products to avoid irritation.
More Information: For product recommendations and reviews, visit NailCareHQ’s Product Guides.
Incorporating Nail Exfoliation into Your Routine
Making nail exfoliation a regular part of your nail care routine is easy and can make a significant difference in the health and appearance of your nails.
Weekly Nail Care Routine
Here’s how you can incorporate nail exfoliation into a simple weekly nail care routine:
- Cleanse: Start by removing any nail polish and washing your hands.
- Soak: Soak your nails in warm, soapy water for 5-10 minutes.
- Exfoliate: Apply your chosen exfoliating scrub and use a nail brush to gently scrub your nails and cuticles.
- Rinse and Dry: Rinse your hands and nails thoroughly and pat them dry.
- Push Back Cuticles: Gently push back your cuticles using a cuticle pusher.
- Buff (Optional): Use a nail buffer to smooth the surface of your nails if desired.
- Moisturize: Finish by applying a moisturizer or cuticle oil to hydrate your nails and cuticles.
Nail Exfoliation During Manicures
If you regularly get professional manicures, ask your technician to include exfoliation in your treatment. This can enhance the overall results of your manicure, leaving your nails and hands looking their best.
Consistency is Key
Like any skincare routine, consistency is key to seeing results. Make nail exfoliation a habit, and over time, you’ll notice smoother, healthier nails that are less prone to common issues like hangnails, peeling, and breakage.
More Information: For more detailed routines and nail care tips, check out Self’s Nail Care Articles.
Final Thoughts: Why Nail Exfoliation Shouldn’t Be Overlooked
Nail exfoliation is an essential yet often overlooked step in nail care. By removing dead skin cells, smoothing rough patches, and preparing your nails for further treatment, exfoliation can lead to healthier, stronger, and more attractive nails. Whether you’re dealing with dry, peeling nails or just want to enhance your manicure results, incorporating exfoliation into your routine can make a noticeable difference.
Remember, the key to successful nail exfoliation is to be gentle and consistent. With the right products and a regular routine, you can enjoy the benefits of smoother, healthier nails and a more polished appearance.
Further Reading and Resources:
- Healthline: Nail Care Guide
- Allure: Nail Care Tips
- Byrdie: Homemade Beauty Treatments
- NailCareHQ: Product Guides
- Cosmopolitan: Nail Care Guide
- Self: Nail Care Articles
With these tips and resources, you’re well on your way to mastering the art of nail exfoliation and achieving the perfect nail care routine. Happy exfoliating!
FAQ: What is Nail Exfoliation? The Missing Piece to Your Perfect Nail Care Routine
1. What exactly is nail exfoliation, and why is it important?
Nail exfoliation is the process of gently removing dead skin cells and any buildup from the surface of your nails and the surrounding cuticle area. This practice is important because it helps maintain healthy nails by preventing issues such as roughness, dryness, and peeling. Regular exfoliation also promotes smoother nails, which makes applying polish easier and helps it last longer. Additionally, by keeping the cuticle area clean and free from dead skin, you can prevent hangnails and reduce the risk of infections.
2. How often should I exfoliate my nails?
For most people, exfoliating nails once a week is sufficient. This frequency allows you to keep the nails and surrounding skin smooth and healthy without causing irritation or damage. If you have sensitive skin, you might want to exfoliate every two weeks to avoid over-exfoliating, which can lead to dryness and irritation.
3. What tools and products do I need for nail exfoliation?
To exfoliate your nails effectively, you’ll need a few basic tools and products: a soft-bristled nail brush, an exfoliating scrub (which can be homemade or store-bought), a cuticle pusher, a nail buffer (optional), and a good moisturizer or cuticle oil. These tools work together to remove dead skin cells, smooth the nail surface, and hydrate the skin around your nails.
4. Can I make my own exfoliating scrub at home?
Yes, you can easily make your own exfoliating scrub at home using natural ingredients. Simple recipes include mixing sugar or salt with a carrier oil like olive oil, coconut oil, or almond oil. You can also add honey for its moisturizing properties or lemon juice for its brightening effect. These homemade scrubs are gentle yet effective and can be customized to suit your skin type and preferences.
5. Is it safe to exfoliate my nails if I have sensitive skin?
If you have sensitive skin, it’s still safe to exfoliate your nails, but you should use caution. Opt for a very gentle scrub with fine particles, such as a sugar-based scrub, and avoid harsh, abrasive scrubs that could irritate your skin. Additionally, limit exfoliation to once every two weeks, and always follow up with a hydrating moisturizer or cuticle oil to soothe the skin.
6. What are the common mistakes to avoid when exfoliating nails?
Common mistakes to avoid include exfoliating too frequently, which can lead to irritation and damage, and using scrubs that are too harsh, which can cause micro-tears in the skin. Applying too much pressure with tools like nail brushes or cuticle pushers can also damage the nail bed and cuticles. Finally, neglecting to moisturize after exfoliation can result in dryness and peeling, undoing the benefits of exfoliation.
7. Can nail exfoliation help with brittle or peeling nails?
Yes, regular nail exfoliation can help with brittle or peeling nails by removing the buildup of dead skin cells and promoting healthy nail growth. Exfoliating smooths the nail surface and allows moisturizers and treatments to penetrate more effectively, strengthening the nails over time. However, it’s important to combine exfoliation with proper hydration and nutrition to address the root causes of brittleness or peeling.
8. Should I exfoliate my nails before or after applying nail polish?
You should exfoliate your nails before applying nail polish. Exfoliation helps to smooth the nail surface, making it easier for the polish to adhere and reducing the likelihood of chipping. It also cleans the nails of any dead skin or oils that might interfere with the polish application. After exfoliating, be sure to thoroughly rinse and dry your nails before applying polish.
9. Can I exfoliate my toenails as well as my fingernails?
Absolutely! Toenails can benefit from exfoliation just as much as fingernails. In fact, because toenails are often more prone to issues like dryness, roughness, and calluses, regular exfoliation can be particularly beneficial. The process is the same—use a gentle scrub, a soft-bristled brush, and follow up with a moisturizer or foot cream to keep your toenails and the surrounding skin smooth and healthy.
10. What should I do if my nails or cuticles become irritated after exfoliation?
If your nails or cuticles become irritated after exfoliation, stop exfoliating and focus on soothing the affected area. Apply a gentle, fragrance-free moisturizer or cuticle oil to calm the irritation, and avoid any further exfoliation until the skin has healed. If the irritation persists, consult a dermatologist to rule out any underlying conditions or allergies that might be causing the reaction. It’s important to always be gentle and use appropriate products for your skin type to prevent irritation in the first place.